Shop+Interview with Spring Bash artist Jaclyn of Precious Little Tot

Jaclyn is the maker behind Precious Little Tot. The shop’s faith-based baby apparel and décor is handmade in Frisco.

Precious Little Tot has lots of new pieces to show this year including a new line of tunic dresses, harem shorts and headbands in premium jersey knit in size 0-3 months up to 4T. Jaclyn is also offering a new line of screen printed Christian graphic shirts with inspirational sayings. For those looking for décor, Precious Little Tot has a line of wall art in bold, vibrant colors with quotes and sayings perfect for Mother’s Day gifts.

Fans of the Spring Bash are already familiar with Precious Little Tot. “We have been attending this event now for the past three years, and it has always been one of my favorites,” Jaclyn said. “We love all the vendors, the Etsy Dallas team members, volunteers and, of course, all our supportive customers.”

Jaclyn said she is looking forward to the Bash and reconnecting with customers in person. “Many of our repeat customers attend this event every year to find uniquely crafted and great quality products. It’s great to hear the stories about how much they enjoyed their purchases from the last year.”

We couldn’t agree more!

Stop by the Precious Little Tot booth and say hello to Jaclyn at the 2018 Etsy Dallas Spring Bash where you can shop the best handmade artists from near and far. We will be at Gilley’s 10:30 a.m. to 5 p.m., Saturday, May 5, 2018. We’ll see y’all at the Bash!

Shop+Interview with Spring Bash artist Jillian of Vintage Static

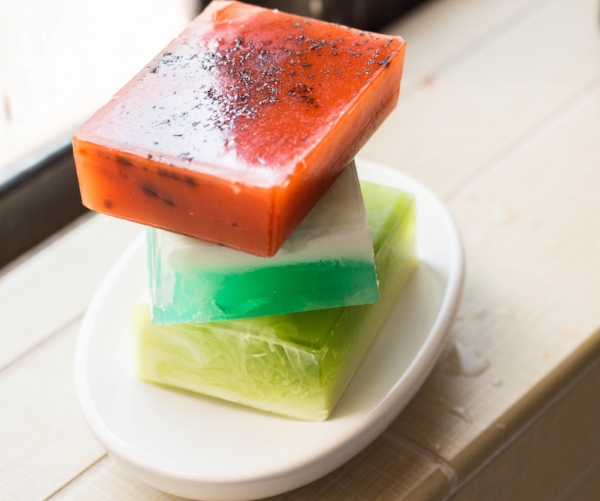
Jillian and Matt are the makers behind Vintage Static. Her modern, handcrafted soaps, scrubs and bath products are made locally in Frisco.

Vintage Static is bringing new bar soap scents and all of their beard oils to the Spring Bash. “This is our first show,” Jillian said. “We are so grateful and excited to be included.” If you’re shopping for Mother’s Day and Father’s Day, she recommends her whipped soaps/scrubs and bath bomb hexes, and the solid shave soaps and beard oil.  

The shop’s name came to her in a dream. “It derives from the nostalgic feel of listening to records, which we do all the time, and the static at the end of the LP side,” Jillian said. She describes their shop as modern and muted, using natural colorants and clean lines with a restrained color palette. 

Jillian describes herself as high-energy and finds inspiration by scanning her Instagram feeds. After sharing some of her favorite grammers, she said, “And of course the Texas ladies crushing it! There are so many. I am constantly impressed by the talent here in Dallas.” We couldn’t agree more! “To see all the talent out there really drives me,” she said. The challenge is to not create every scent or color that comes to mind and to remain selective and focused, she said.

Stop by the Vintage Static booth and say hello to Jillian at the 2018 Etsy Dallas Spring Bash where you can shop the best handmade artists from near and far. We will be at Gilley’s 10:30 a.m. to 5 p.m., Saturday, May 5, 2018. We’ll see y’all at the Bash!

Shop+Interview with Spring Bash artist Stephanie of Ox and Pine

Stephanie is the bookbinder and artist behind Ox & Pine. Her personalized leather journals, handmade notebooks and other leather goods are made here in the Dallas area.

She will be offering personalization stamping on the spot at the Spring Bash. “We’ll have some fun designs stamped onto leather luggage tags for a special price only available at the Bash,” Stephanie said. “It’s so fun to see customers face-to-face, and to be able to physically show them our leather goods.”

Stephanie said she is excited to meet people in person at the Bash. “I don’t do other any other in-person events, so this is a special occasion for me to meet and talk with customers in person.”

If you’re looking for a meaningful, lasting gift for a loved one for Mother’s Day, Father’s Day, graduation or some other special occasion, something from Ox & Pine may be the perfect fit. “I love creating leather goods and working with my hands,” Stephanie said. “I’m always on the lookout to create something special that will be useful and beautiful.”

Stop by the Ox & Pine booth and say hello to Stephanie at the 2018 Etsy Dallas Spring Bash where you can shop the best handmade artists from near and far. We will be at Gilley’s 10:30 a.m. to 5 p.m., Saturday, May 5, 2018. We’ll see y’all at the Bash!

Shop+Interview with Spring Bash artist Tyler of Wayne Works

Tyler is the craftsman and designer behind Wayne Works. His handcrafted furniture, lighting and home décor is created at his shop right here in Dallas.

You may remember his work from previous Bashes. “This is the first show that I have done in over a year and I am excited to meet new people and see familiar faces!” Wayne Works will have new live edge slab pieces for custom projects for this show. He said he looks forward to meeting new people and discussing new projects with those in attendance.

Tyler is a mechanical engineer by trade. “I am naturally creative and I find my engineering side helps with proper fabrication of my designs,” Tyler said. “My lean manufacturing background aids in taking objective looks at how I handle my business and challenging me to try something new or different to see how it works.”

“Conversations with fellow creatives is the best motivation for me,” Tyler said. “When you hear the passion in someone’s voice, it can be very inspiring, and makes me want to get to work in the shop.”

Stop by the Wayne Works booth and say hello to Tyler at the 2018 Etsy Dallas Spring Bash where you can shop the best handmade artists from near and far. We will be at Gilley’s 10:30 a.m. to 5 p.m., Saturday, May 5, 2018. We’ll see y’all at the Bash!

Gifts for Teachers: Show your appreciation with a handmade gift

Learn Arm Knitting with Woolly Element

We love Woolly Element. It's so cool to see Clare creating her extreme knitting pieces. We aren't ready for those giant needles just yet, but Clare was kind enough to share her pro tips for learning arm knitting. It's perfect for those of us who are new to knitting or just looking to try something different. Thank you, Clare! 

Learn A New Craft This Spring - Arm Knitting with Woolly Element, Inspired by Flax and Twine

At Woolly Element, we LOVE large scale knitting. But we also know that high quality, super chunky yarn and industrial sized needles come at high price points and may be hard to find.  Enter: arm knitting. With arm knitting, you can use a variety of yarn types, often layering up several strands at once to get that super bulky look. There is no need for needles - all you need is your arms and your yarn. Finally, arm knitting is perfect for first-timers and experienced knitters alike, and it is super FUN. So, what are we waiting for? Let's get started.

My arm knitting journey

I have the opportunity to travel A LOT and so I am always bringing along projects for the plane. When I traveled to Australia in 2017, I brought along a print out of arm knitting instructions from Anne Weil (Flax and Twine) and some yarn… and I learned how to arm knit on the plane. It took some trial and error (and it stirred a lot of interest from flight attendants and other passengers), but I got the hang of it, and by the end of my flight, I was well underway with my first arm knitting project.

Clare Kearney of Woolly Element arm knits a chunky scarf with Little Dandelion, K1S1 yarn, 100% merino wool, on a flight back to Dallas.

Clare Kearney of Woolly Element arm knits a chunky scarf with Little Dandelion, K1S1 yarn, 100% merino wool, on a flight back to Dallas.

At about this time last year, I was looking to put this new skill to use. I was so excited to find Flax and Twine's adorable arm knit bunny and decided to make one for my niece for her 1st birthday (which happened to land on Easter!). Check out how adorable it is in this super short video: Giant Arm Knit Bunny

If you are at all interested in trying your hand at this, I highly encourage you give it a go. Here is the full pattern for this giant arm knit bunny, with step-by-step video instructions on how to arm knit (again, great for learners and beginners) and how to create and construct this lovable bunny for someone special this Spring.

The price point is $6, and Flax and Twine is offering a limited number of 20% off discounts -- just use the discount code: HOPPING

Through my own trial and error, here are some tips and tricks to help you make this beautiful bunny:

  • If you are a traditional knitter but new to arm knitting, note that you don't "flip" your work with arm knitting. Instead, you go back and forth, moving the stitches from your left arm to your right, and then from your right arm to your left. So even though you'll use all knit stitches, you'll actually create a stockinette stitch (flat on one side, bumpy on the other) instead of a garter stitch. This is all you need to learn and do to create this bunny. Note: if you do in fact want to make something in the garter stitch, you'll need to knit one row, then purl the next row, and repeat. This is what I did to make the scarf above. 
  • Who will be loving this bunny once you're done? If that "somebunny" is a young child, you'll want to consider certain modifications:
    • For the eyes - use a different color yarn (black, blue, brown, etc) instead of buttons.
    • For the ears - skip on the optional gauge wire. The floppy ears are super cute! 
    • Think ahead about the stuffing. You'll want to match the color of the filing to the color of your yarn. When I made my bunny, I had a polyester / fiberfill stuffing ready to use, but then I realized that it would likely fall out between the stitches. So I filled that stuffing in a burlap material and made a kind of handmade pillow, and then I filled the bunny with the stuffed pillow. However, I would recommend following Anne's recommendations here -- you can get a quilting batting as the filler or you can reuse an old blanket or comforter, if you have one available. 

As you start and progress on your first arm knit project, please reach out with any questions or comments. I would love to hear from you. You can reach me at clare@woollyelement.com or on Instagram

Happy knitting and happy spring!

The 100 day project

100dayproject.png

If you're on Instagram, you've probably seen many different iterations of 100 day projects throughout your feed. It's simple in theory, just pick an action, and commit to repeat it for 100 days. But THE 100 Day Project was started by Elle Luna and Lindsay Jean Thompson and it can be argued that the collective power of a community of people working their way through 100 days of *something* at the same time makes it even more meaningful. It starts on April 3 if you're thinking about joining in this year. You can read all about the project here but if you want some tips and ideas on how to make it happen for you this year, read on and let us know about your project in the comments so that we can follow along!

1) Look at your calendar
Think about what you have going on between April 3 and July 11. Are you going out of town for 2 weeks? If you, are you considering an action that you can only do at home, or does it work on the road too? Or does that even matter to you? You might be fine with missing a day here or there, but make sure you decide if it's important to you to finish on the same day as everyone else or not.  

100day1.jpg

2) Pick an action
This can be anything! Try to stretch yourself--it can be something you've been meaning to do for a long time, a new skill you want to work on, or something you need to get better about dedicating your time to. You may want to think seriously about your personal goals and how you can use these 100 days to take a step in a new direction, or you may want to pick something really light and fun and see where it takes you. Browse old posts from the #the100dayproject hashtag on Instagram if you are looking for ideas or inspiration.

3) Get your supplies ready
If you're doing an art or crafty project that will take some supplies, go out to Michaels, Asel Art, or wherever you like to stock up so that you have what you need on hand to get started. Maybe you even want to set up a corner of your home where you can go to work on your action every day--getting your life organized to make time for something new each day will help you stick with it for the first week or two and by then you'll have a great routine established to keep it going for the full 100 days.

4) Come up with an original hashtag
This is the fun part. When you post your images on Instagram, you can use the #the100dayproject official hashtag, but you're also encouraged to pick your own unique hashtag to post with all of your updates. Nothing beats taking a look at your 100 days of fun all together on their own hashtag (here are my past projects if you want to take a peek: #100daysoftokodotslettering (2017) #100daysoftokodotscrochet (2016)

100dp2.jpg

5) Throw your insecurities out the window and get ready to go!
If you're not used to sharing a lot on social media, it can be unsettling to commit to posting your progress on a certain project every day, even if it's not "perfect" or "ready." In some ways this is the biggest challenge, but the best part, too. You will be surprised about which posts your followers love and the energy it will give you as you continue your project.  

See you on April 3!

Celebrate Spring with this DIY Easter Tree Tutorial

Sidney, of GnomeStones, is inspired by nature. You can find her jewelry on Etsy. Just in time for spring, Sidney is sharing this fun Easter tree tutorial. Follow along for all the steps in this fun DIY. Hoppy Spring, y'all!

Making an Easter tree is fun, and you probably have much of what you will need around your home already. Here are the supplies you want to round up:

  • Sand
  • A large vase
  • Spray paint
  • Clippers
  • Trash bag
  • Spring/Easter decorations 

Step One
Find a sturdy, well-branched limb to make your tree

Step Two
Use your clippers to collect your branch

Step Three
Place your vase in the trash bag; put the branch in the vase

Step Four
Fill the vase with sand to keep your "tree" sturdy

Step Five
Be sure the vase is covered with the trash bag and spray paint your "tree" (we used white spray paint)

Step Six
Let the "tree" dry for an hour before bringing it inside to decorate

Step Seven
Add your Easter/Spring themed decorations! 

Saint Patrick’s Day Lapel Pin Tutorial with Rhapsody Letterpress

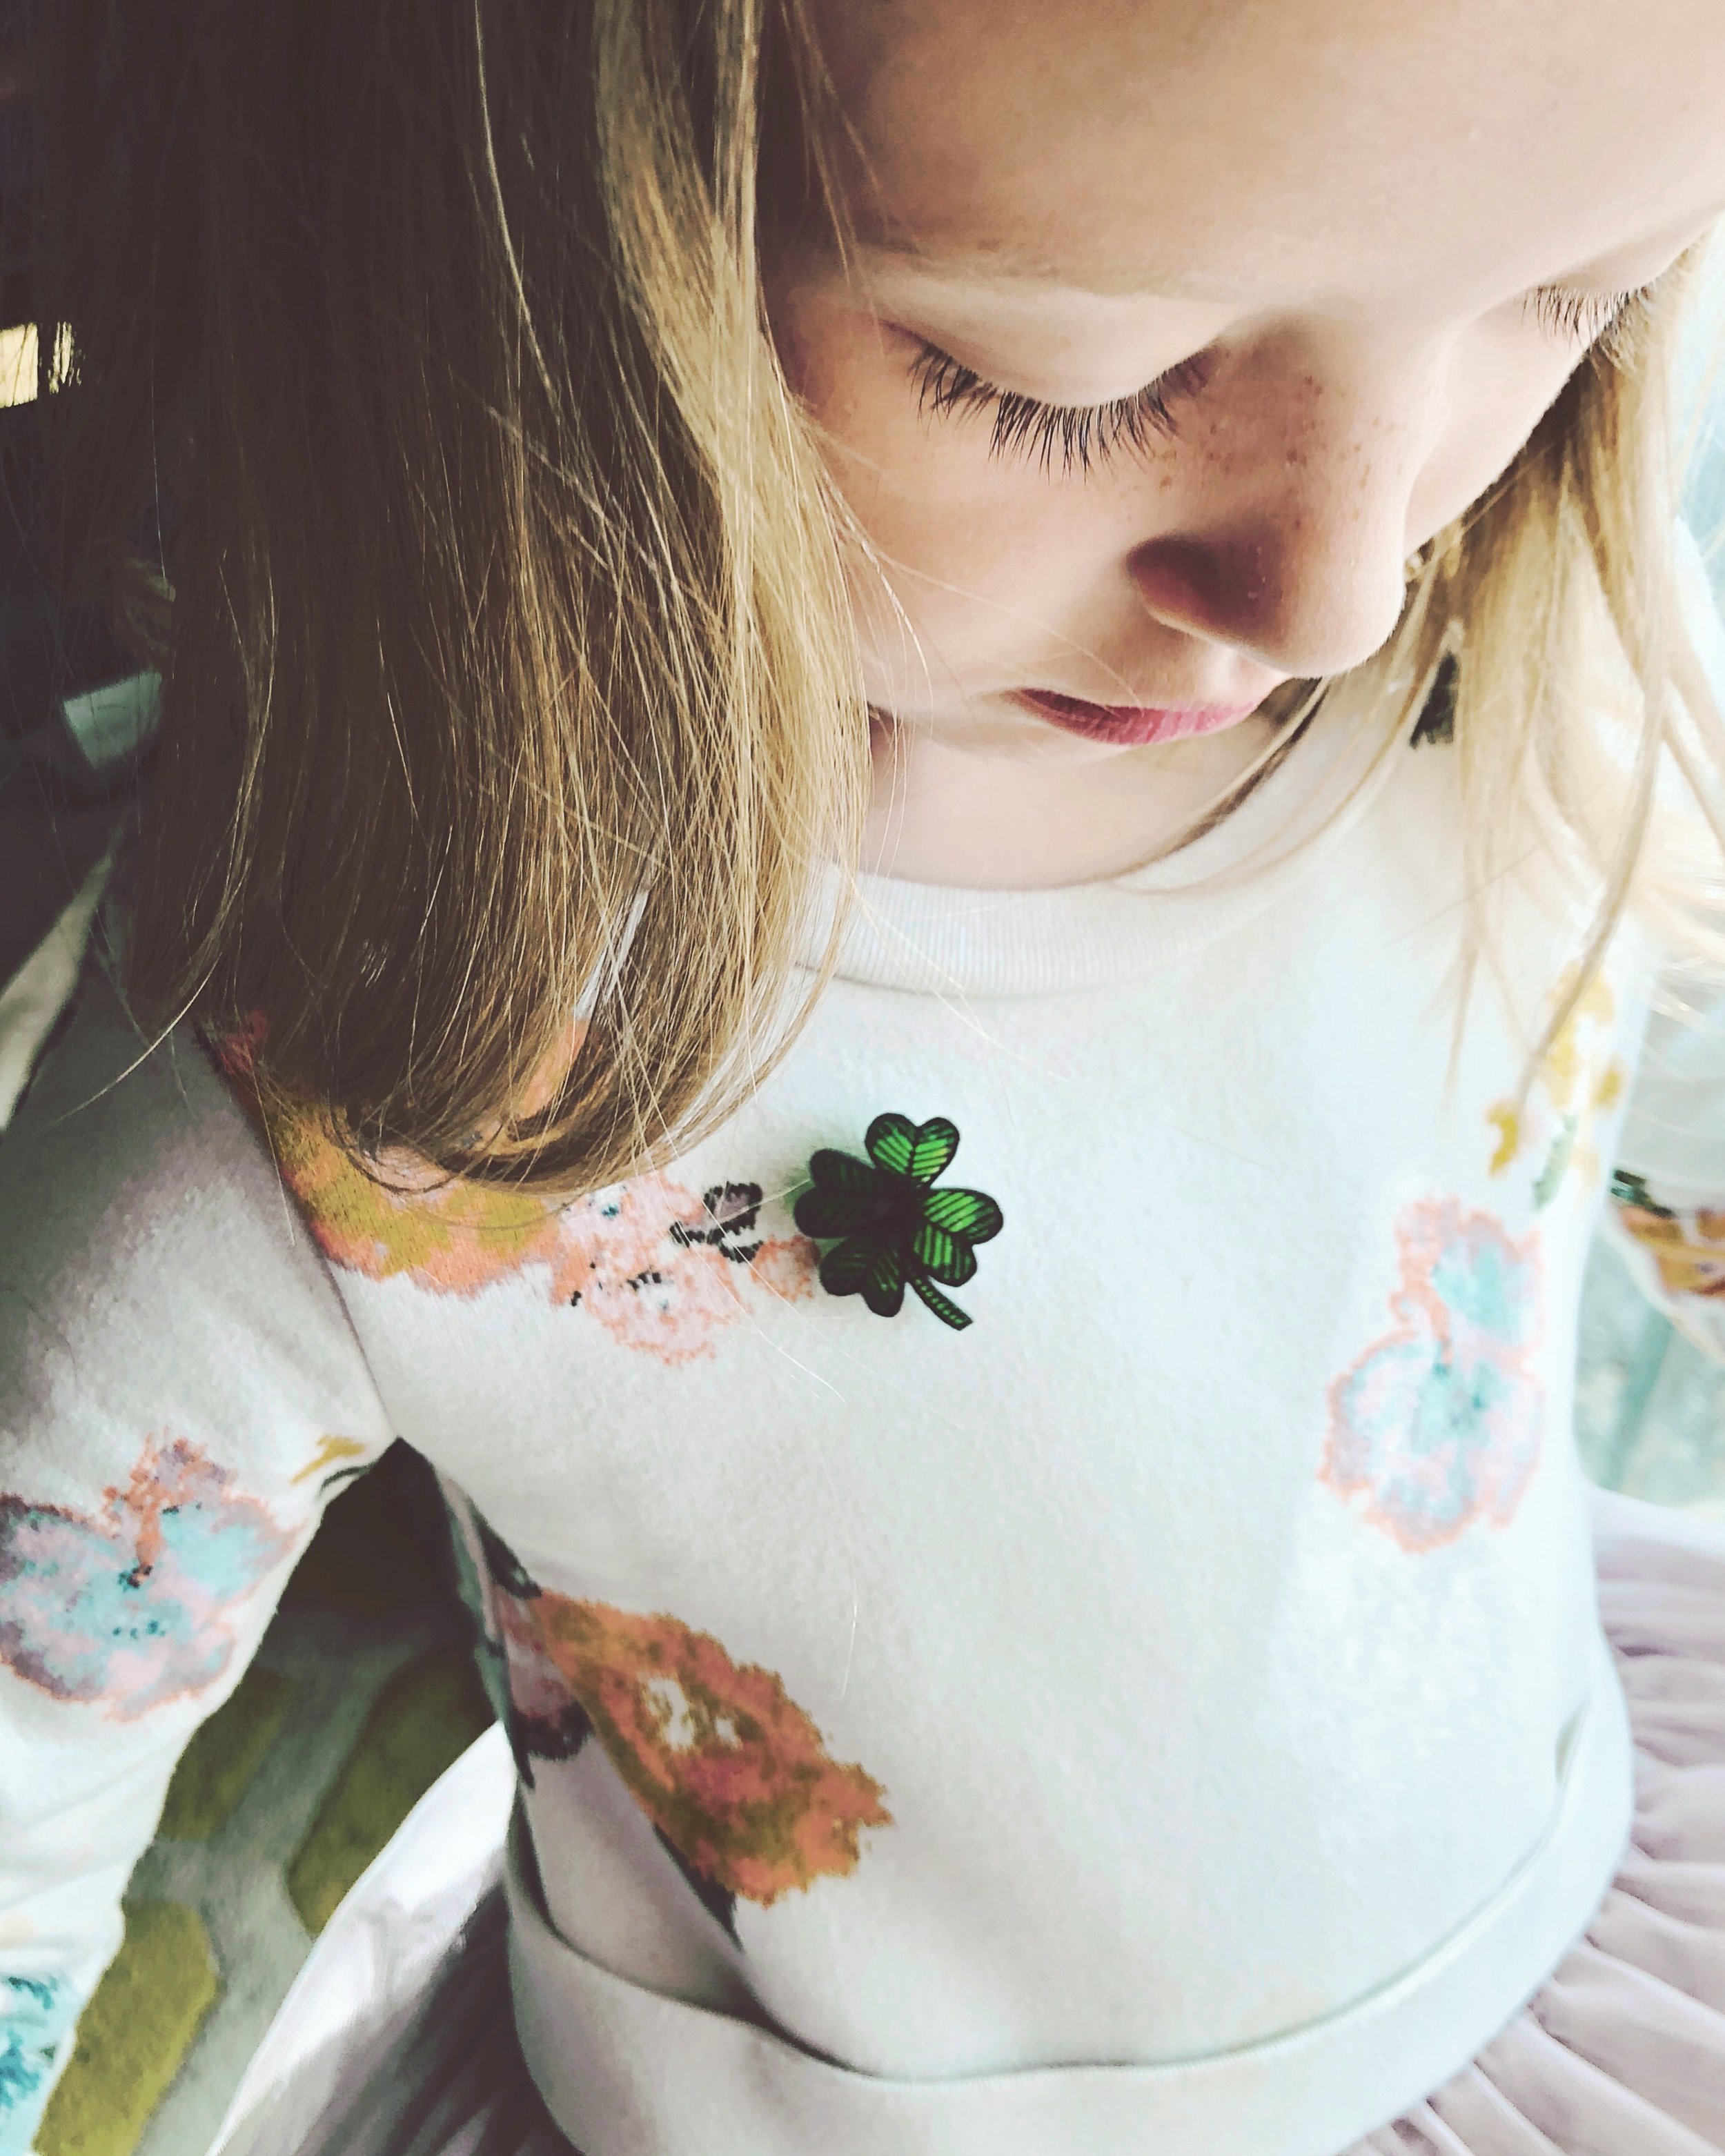
This Saturday is Saint Patrick’s Day, and Katrina from Rhapsody Letterpress is here to share an awesome lapel pin tutorial using shrink plastic and sharpies.

IMG_2025.JPG

I just discovered shrink plastic, and it is so much fun! Even better, it is really easy and kid friendly, and you could even use recycled materials with great results. So, clean and save those recycle number 6 take out boxes, or buy some Shrinky Dinks on Amazon. For this craft, you will need shrink plastic, sharpies, super glue, and pin backings.

IMG_2008.JPG

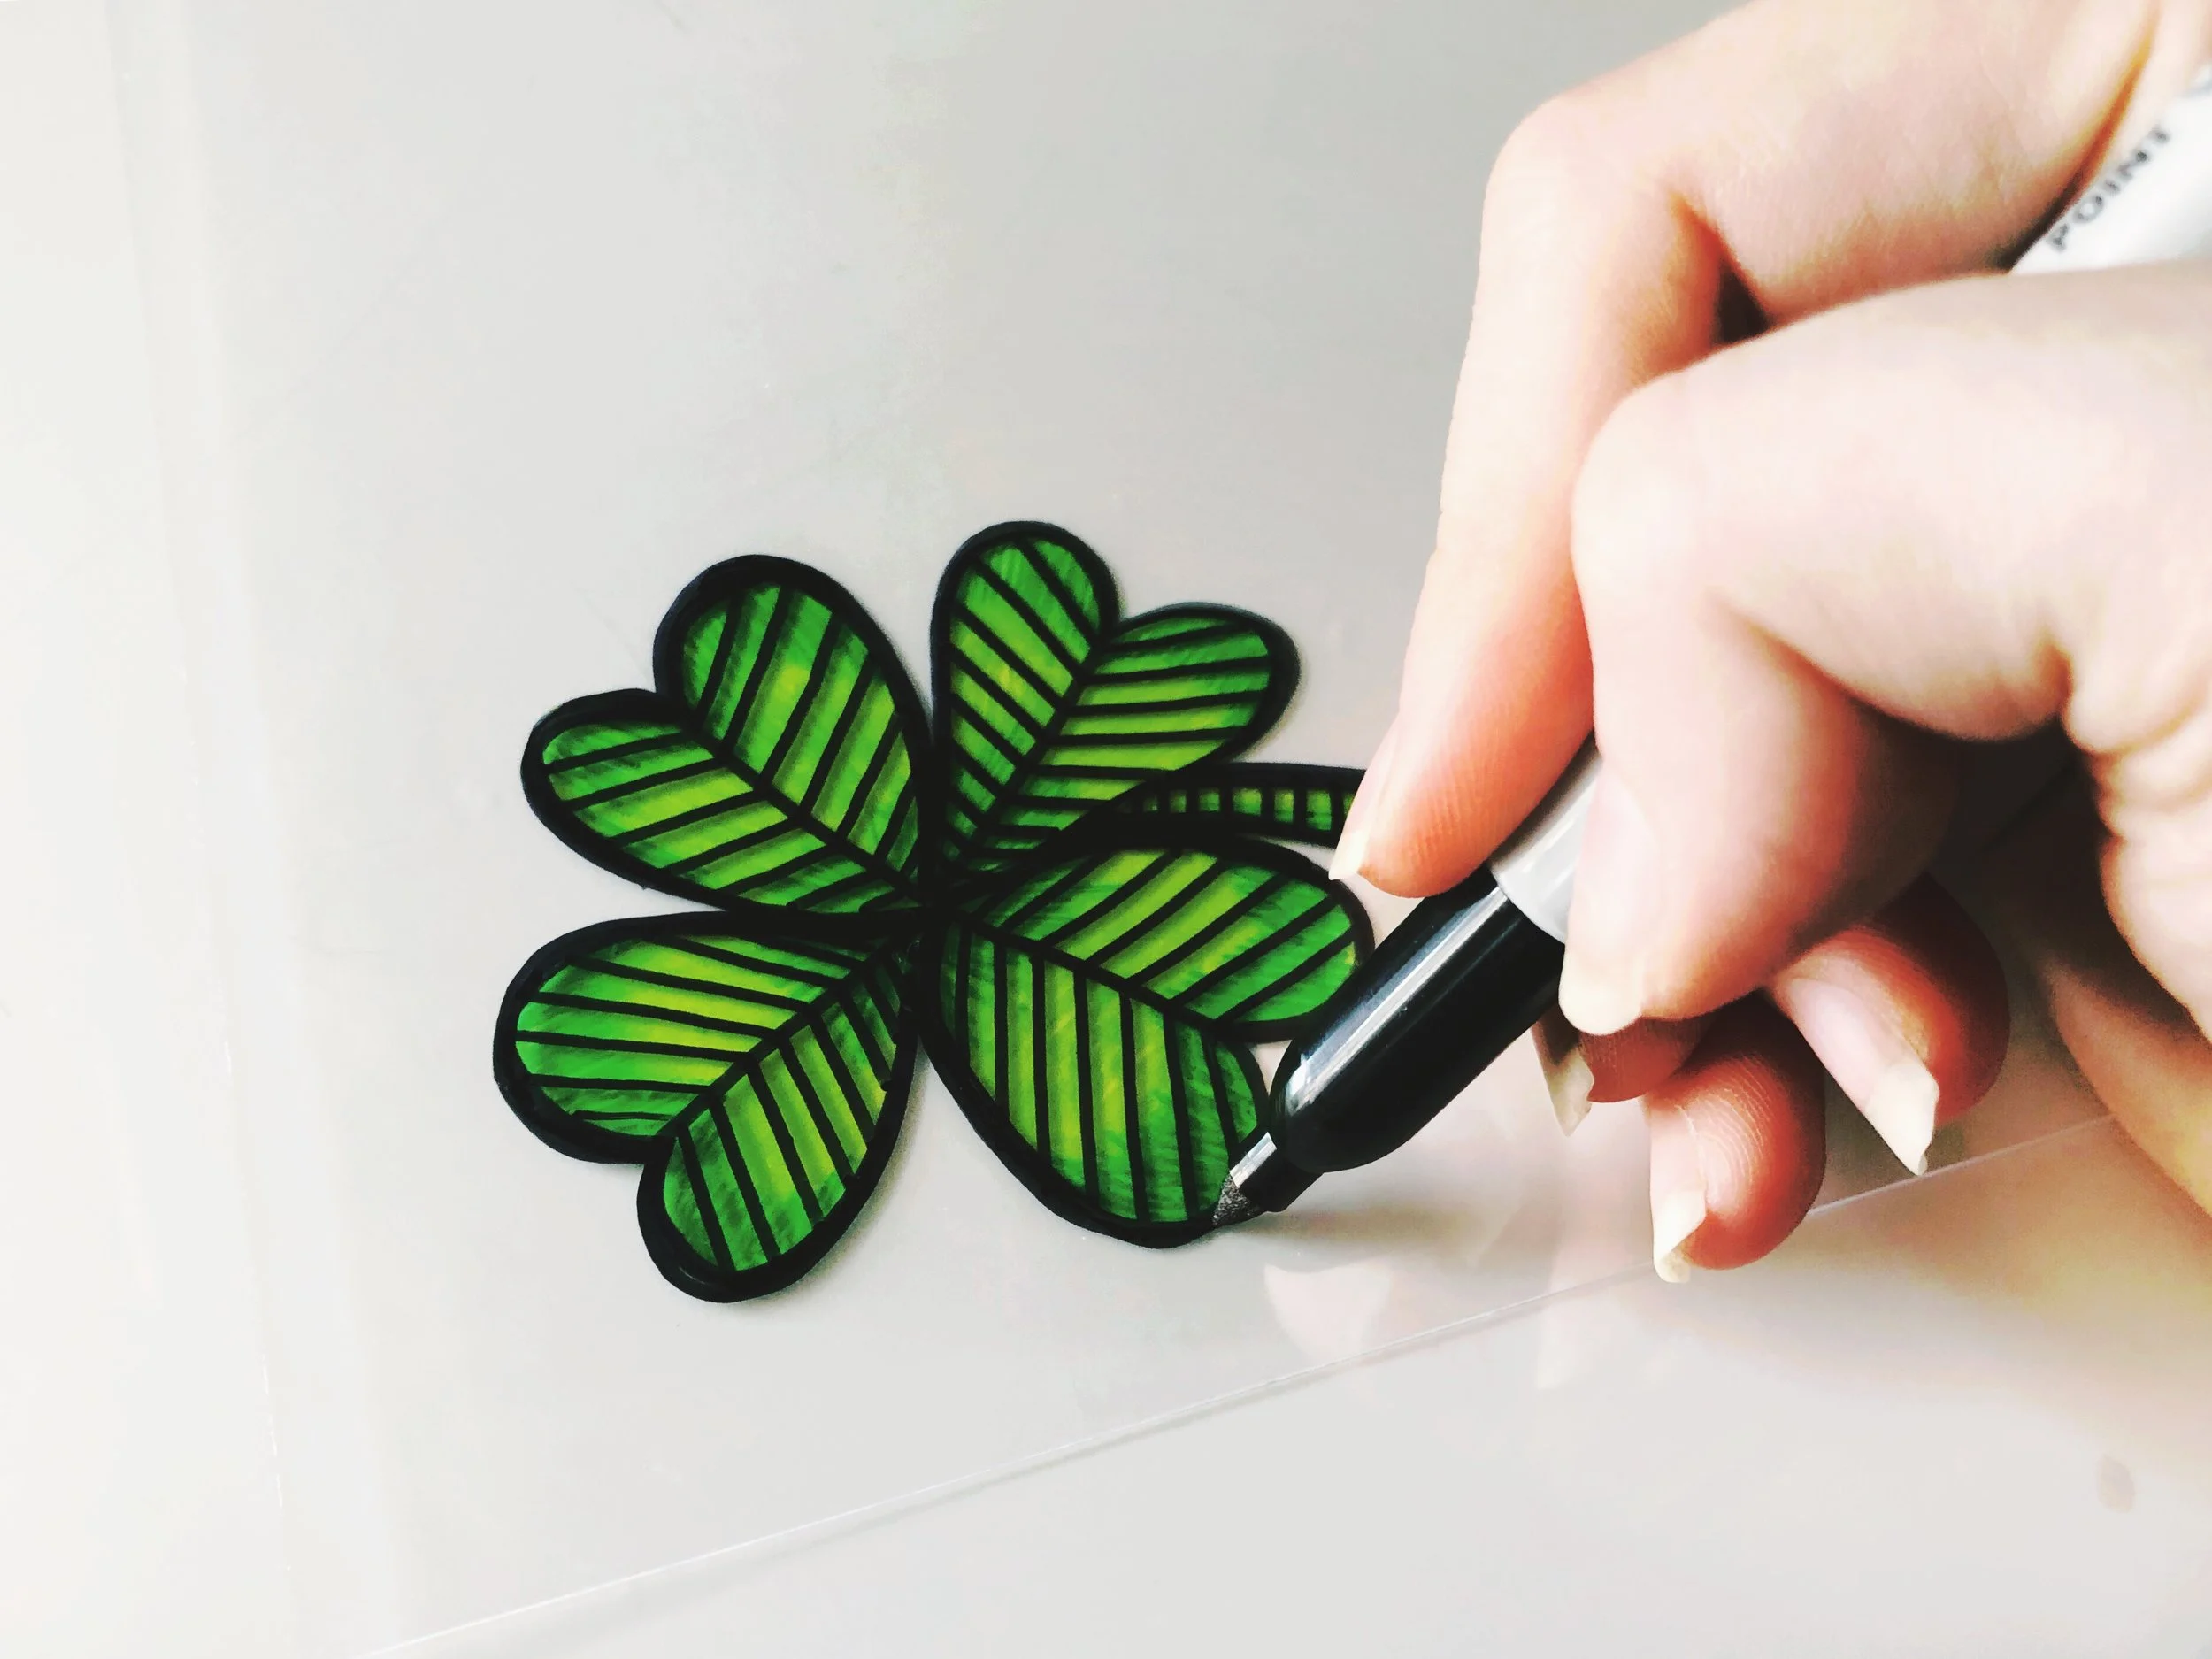
Begin by sketching your design on the plastic with a sharpie about 5x the size you want your pin to be. When working with transparent material, it’s a good idea to work lightest colors to darkest, and build by layers.

IMG_2010.JPG

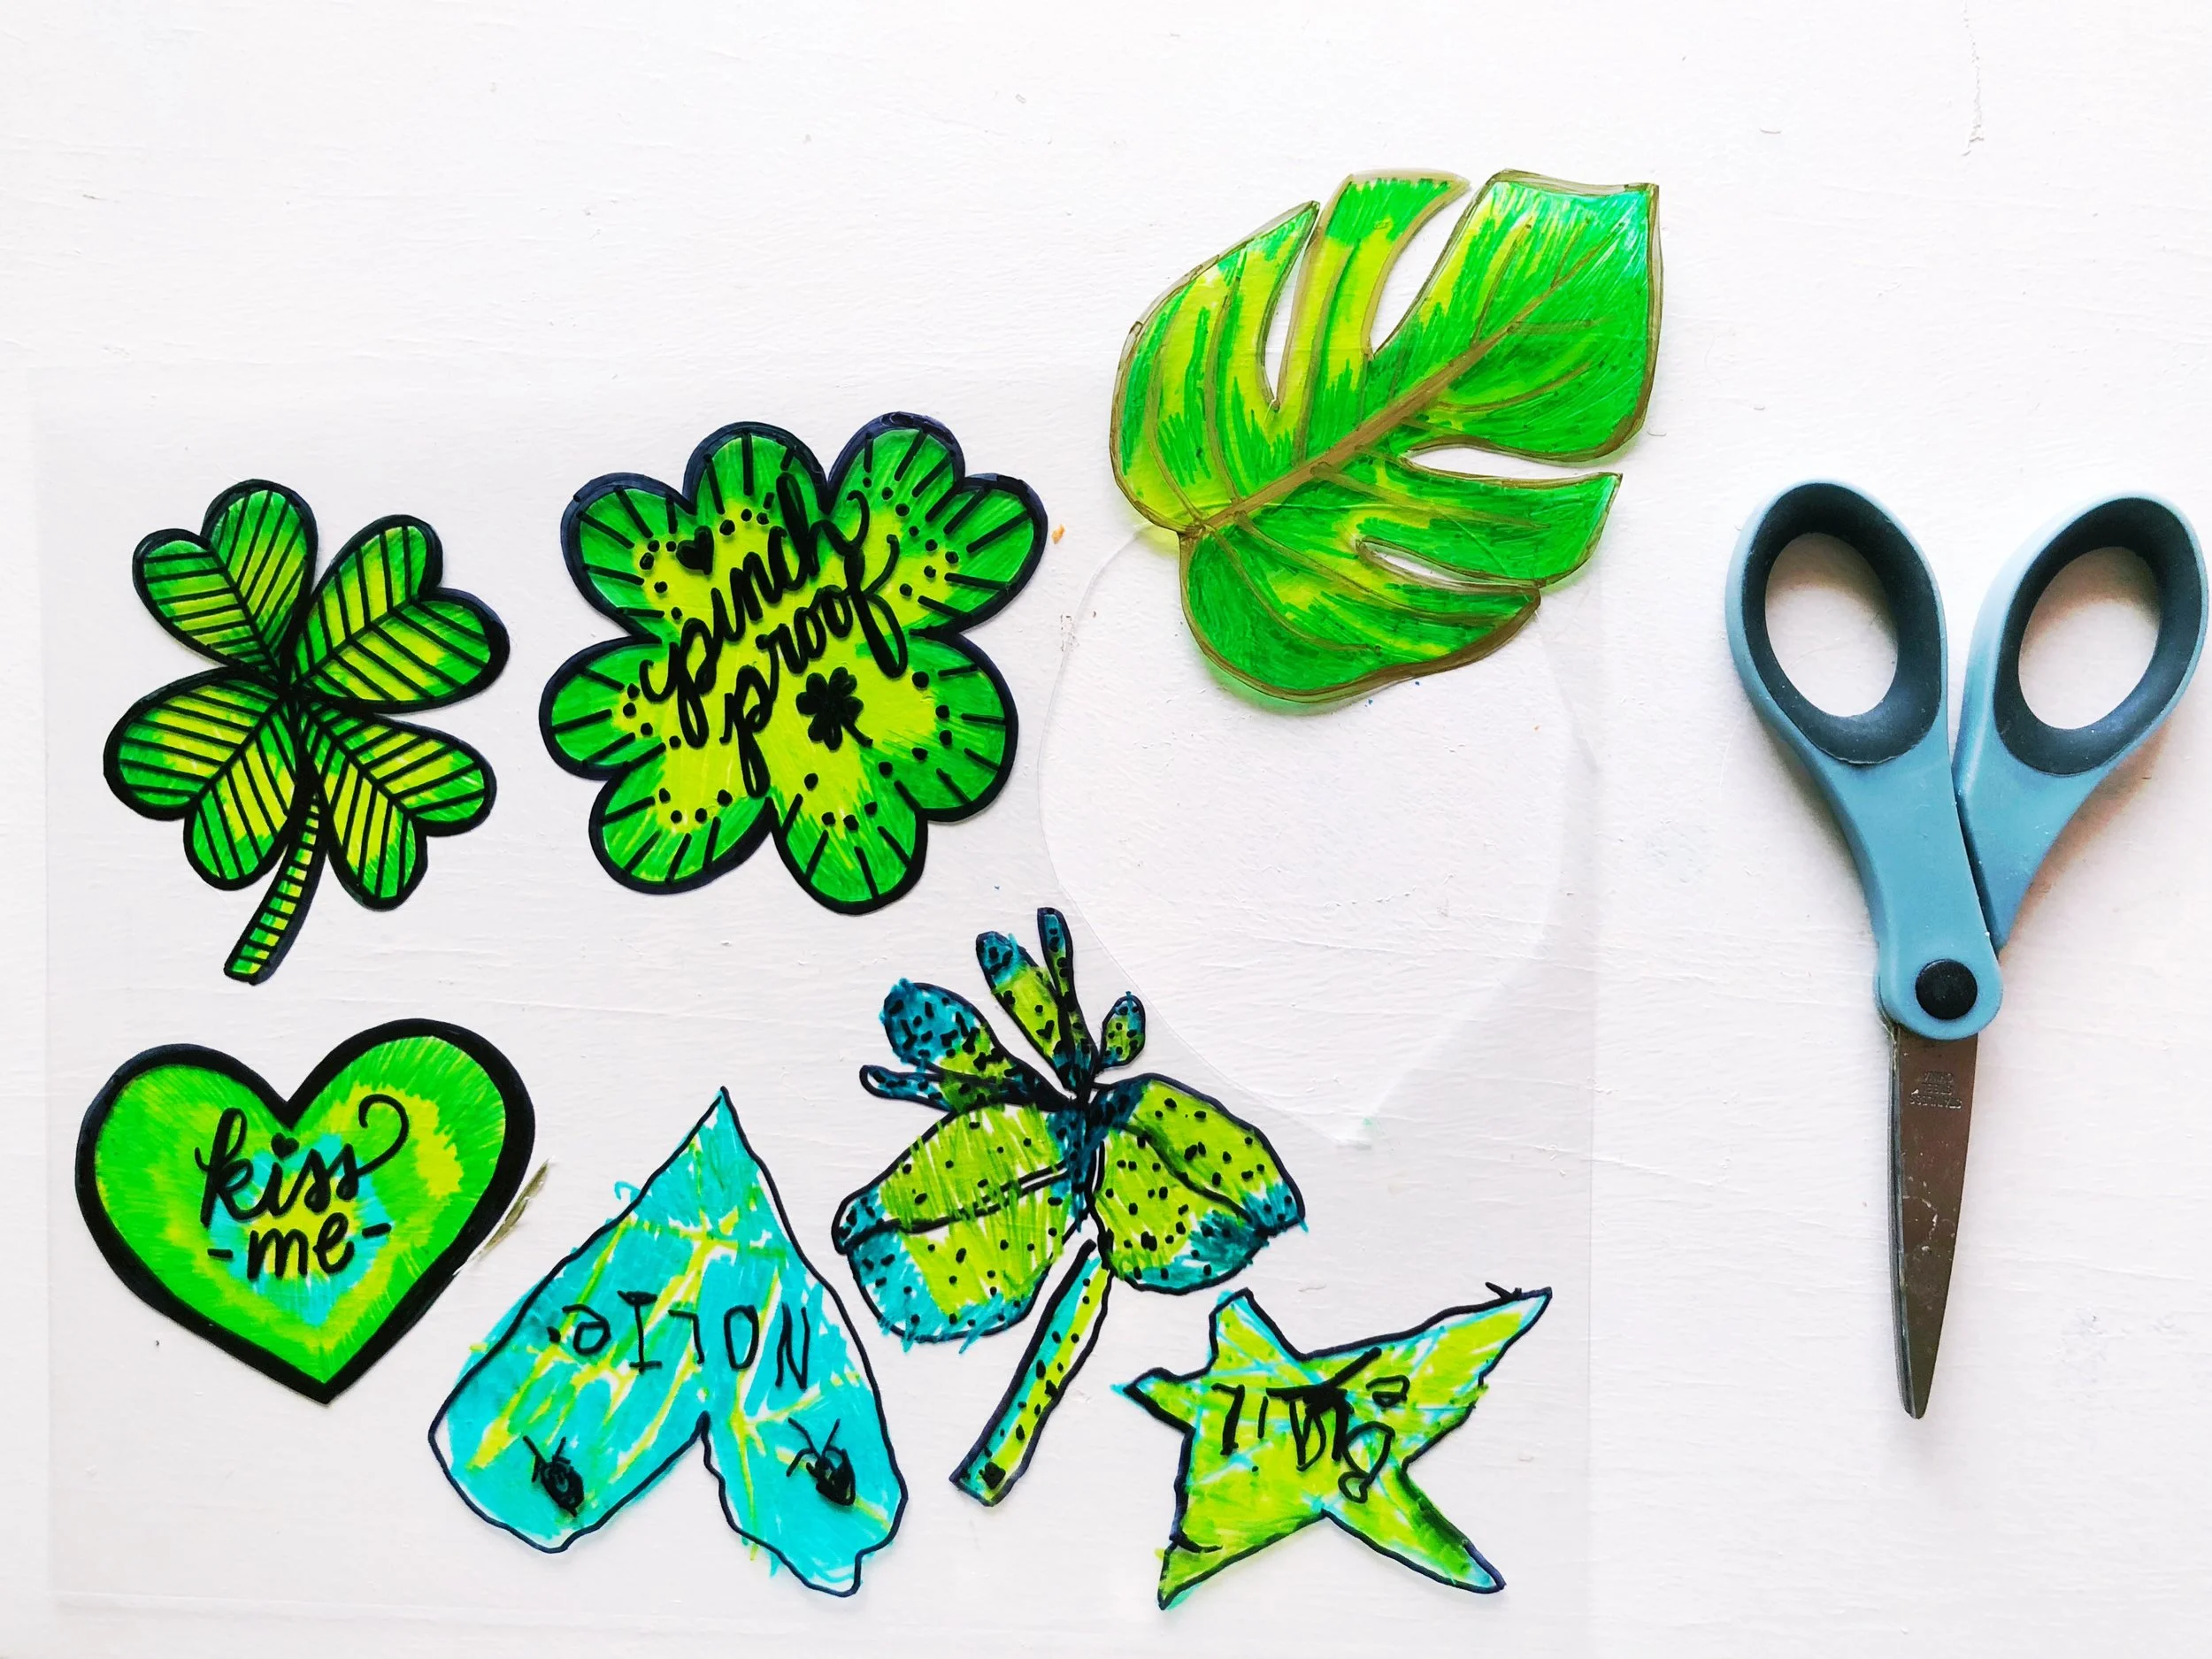
After you have finished coloring in your design, use black to outline and detail your drawing. (My daughter drew a few too!)

IMG_2011.JPG

Preheat your oven to 325°F, and carefully cut out your designs. Cut all the way into the outline unless you are going for a clear edge.

IMG_2012.JPG

Line a cookie sheet with foil (smooth for best results), and lay out your cutouts so that they don’t touch. Place them in the oven and watch the magic! They curl up and then shrink. It only takes about 2 minutes, but leave them until they flatten out. Pull them out of the oven and allow them to cool.

IMG_2013.JPG

Use super glue to mount the pin, and let it dry. If you don’t write on the front, you can flip the piece over for a shiny, transparent effect.

IMG_2007.JPG

I hope you enjoy working with shrink plastic, and feel inspired to make all sorts of fun stuff. Tag us on Instagram @etsydallas and show us what you make! Happy Saint Patrick’s Day!

Must-have Local items this spring

Etsy Dallas Spring Finds.jpg

1.  Pineapple scarf from Milquetoast Designs 2. Pressed flower jewelry from Gnome Stones 3. Natural Deodorant from Sasha's Hand Poured 4. Block printed thank you cards from Wandering Paper Co. 5. Printable St. Paddy's Bingo from Favors and Stuff 6. Punny herb planters from DCD Design Co. 7. Bluebonnet wall art from Martolana and 8. Melon + mint soy candle from Mythology Candles

Meet the 2018 Etsy Dallas team

Etsy Dallas is a local craft collective run by a juried group of crafters, artists and designers in Dallas who sell their wares on Etsy. (No, we aren't the same as Etsy. We have the blessing of Etsy as the official team for the Dallas metroplex.) We are an all-volunteer group who are serious about our handmade businesses and the success of this team and its endeavors.

Etsy Dallas began in 2007 and was the first city team in Texas. Since the founding, our members have been invested in the Dallas community, working with Etsy Dallas to benefit different aspects of the creative community and culture that makes this a great city. The team is run by a group of volunteers known as the Leadership Team.

Sabrina and Jenny, Co-Presidents of Etsy Dallas, run The Pig and the Peacock

Sabrina and Jenny, Co-Presidents of Etsy Dallas, run The Pig and the Peacock

SaRatta, Vice President of Etsy Dallas, runs Expressions Bracelets

SaRatta, Vice President of Etsy Dallas, runs Expressions Bracelets

Molly, Secretary for Etsy Dallas, runs Tokodots

Molly, Secretary for Etsy Dallas, runs Tokodots

Alexis, Community Director for Etsy Dallas, runs Whipped Up Wonderful

Alexis, Community Director for Etsy Dallas, runs Whipped Up Wonderful

Rori, Social Media Director for Etsy Dallas, runs MadeByRori

Rori, Social Media Director for Etsy Dallas, runs MadeByRori

Lesia, Graphics Queen of Etsy Dallas, runs SurlyBunny

Lesia, Graphics Queen of Etsy Dallas, runs SurlyBunny

The mission of Etsy Dallas is to promote the handmade movement in the Greater Dallas area and beyond. You can browse all our member artists for some of the best handmade wares around. 

We hope to see y'all at our events this year. We had a great start to the year with our Love Letters Challenge. And there is much more to come! You can sign up for our newsletter to be sure you don't miss anything. 

Fun Finds for Fat Tuesday

Mardi Gras Bath Marshmallows from Whipped Up Wonderful

Mardi Gras Bath Marshmallows from Whipped Up Wonderful

Mardi Gras is here and we are celebrating Fat Tuesday with some of our favorite Etsy Dallas finds. Here are a few of our handmade finds for the day. Laissez les bons temps rouler, y'all! 

Green Quartz in Gold Filled Earrings from Heidy Henke Designs

Green Quartz in Gold Filled Earrings from Heidy Henke Designs

Set of Cocktail Paper Coasters from Fresh Out Of Ink

Set of Cocktail Paper Coasters from Fresh Out Of Ink

Resin Flower Charm from GnomeStones

Resin Flower Charm from GnomeStones

New Orleans Watercolor from Joy Street Maps

New Orleans Watercolor from Joy Street Maps

Stoneware Flask Decanter from Both Hands Studio

Stoneware Flask Decanter from Both Hands Studio

DIY Valentine's Day Cards for Kids from Kat French Design

We have a really fun DIY Valentine tutorial for you courtesy of Kat French Design. Be sure to check out her smart, hilarious and spot-on stationery in her shop and follow her on Instagram for lots of fun posts. Thank you for letting us share your post with our readers, Kat! ...

As a lover of cards and all things handmade I decided that I wanted my son to make his own Valentine’s Day cards this year.

He is five years old and is at the stage where he loves coloring and cutting with scissors. He needed to be able to make 16 cards to give to his preschool classmates and, at first, I thought that would be way too many cards for a kid that age to make…until I realized that he could make 1 or 2 BIG CARDS and then cut them (which he loves doing) into smaller cards. BINGO.

So here's the process:

 1. Print two of these Valentine’s Day card sheets (8.5″ x 11″). They are double-sided so make sure to print the fronts then run them back through the printer again to print the back sides. I printed on watercolor paper that I trimmed down to size, but it’s not necessary. You can use regular printer paper or card stock.

2. Gather watercolor supplies and let your child go to town. We talked about what colors typically symbolize love (reds, pinks, purples) and I encouraged him to use those…but any bright colors will be just fine. Let dry and flatten with by placing a heavy book on top of them overnight

3. Sign name on card backs.

4. GLITTER! (optional) Apply glue with a cotton swab then sprinkle on glitter. My son got to do the glue and I handled the glitter because that stuff is just a hot mess otherwise. Let dry.

5. Cut cards out along dashed lines.

6. (optional) If your child goes to a school that allows candy or gifts to be attached you can go ahead and use some washi tape to attach a small treat. My son’s class wasn’t allowed to do this (which I am totally thankful for).

This was a fun project that spanned several days for us which was great because it was basically three afternoons worth of crafting. Hallelujah! It also incorporated a ton of fine motor skill builders with painting, cutting and writing.

The only thing I might do differently next time would be to possibly skip the glitter step because I’m pretty sure his teachers and classmates’ parents might hate me after he brings the cards to school and gets glitter on everything. Oops…

Feel free to download the card sheets and make your own. Happy Valentine’s Day!

Join us for Love Letters for Meals on Wheels + how to host your own Love Letters party

We are so excited to see y’all at our Love Letters Challenge event. Every year we team up with Meals on Wheels in Dallas to make Valentine’s Day cards for homebound seniors. This year, we have created a public event so everyone can join us to spread the love around.

Join us at noon on January 27 at Café Izmir in Plano. Food and drink will be available for purchase. Crafts are supplied. Please keep in mind that although this is a family-friendly event, there are a limited number of volunteers to help out so your kids will need your help.

If you can’t attend our event, here are some quick tips to get your own Love Letter Challenge going:

1. Set the date. You’ll want to get your tribe together before Valentine’s Day so the cards make it to Meals on Wheels (or your chosen destination such as a retirement home, hospital, etc.) on time.

2. Get some supplies together.

The fun thing about Valentine’s Day cards is the sky is the limit with creativity and you don’t have to be shy about your abilities. They can be simple and sweet and heartfelt or fancy and flowery!

Ingredients for a nice card:
Assorted construction paper or scrapbooking paper
Ribbon
Scissors
Pencils

Optional:
Glitter
Paper doilies
Stickers
Washi tape
Lace
Stamps

3. Grab some wine and get your friends together. Make it fun! Maybe host a kids party or a mom meet-up. Or host a craft night with your friends. Still need some creative inspiration? Check out this DIY Valentine’s Day card tutorial from The Pig and the Peacock.

4. Spread the love around! Once the cards are finished, deliver them to your chosen destination or mail them to your local Meals on Wheels.

Dallas’ local Meals on Wheels:
VNA Haggerty Center
1440 W. Mockingbird Lane
Dallas, Texas  75247
214-689-2639

Calling all procrastinators: apply now for Etsy Dallas 2018

Time is running out to apply for the 2018 Etsy Dallas team. Etsy Dallas is a group of local artists and crafters who are serious about their handmade businesses as well as the success of the team and its endeavors. Members are also invested in the Dallas community, working with Etsy Dallas to benefit different aspects of the creative community and culture that makes Dallas a great city. 

Our mission is to promote awareness and support of the handmade movement in Dallas and the surrounding Metroplex; to establish and maintain the integrity of the local handmade movement; to act as a cooperative resource and mentoring network to grow businesses within the handmade industry; to foster higher business standards within the handmade industry by encouraging better business practices and methods; to educate the public in the creation of modern handmade crafts in order to inspire and empower individuals and bring together communities. 

Applications close January 12, 2018. If you live in the Dallas area and are interested in applying for our team, apply now!

8 handmade finds for your best 2018

We have big plans for 2018 and a list of resolutions to prove it. How do you motivate yourself to stick to your goals? We have a roundup of 8 local finds which are great for helping us meet our goals and for rewarding ourselves for our achievements. 

1. Track goals with pretty stationery from Kat French Design. We love this to-do list notepad (and the calendar notepad above) for helping us knock out our daily and monthly tasks. 

2. Keep things tidy and smelling fresh with soy wax candles from The Pig and the Peacock. This one in Lemongrass Sage is uplifting with garden and citrus notes that leave us feeling refreshed and energized. 

3. Recover from workouts and practice self-care with a bath bomb from Whipped Up Wonderful. This Honey Almond bomb is made with hand-ground honey and oat powders that will pamper your skin and is thought to reduce the signs of aging. Yes, please!

4. Take better care of your skin with soothing lotion from Sasha's Hand Poured. We love this silky Spearmint Eucalyptus lotion for winter. 

5. Make more meals at home. Pro tip: We hear good things about the Instant Pot. Don't forget a cute apron while you whip up something yummy. We love the selection from Mia Maria.

6. Feed your friendships. Send your friends some real mail and let them know you're thinking of them. When is the last time you got some happy mail? Didn't it feel great? We love the Texas Knit notecards from Tokodots

7. Remember to meditate. The Texas Zen Garden from SurlyBunny has everything you need. 

8. Keep a journal in 2018. We love these personalized leather journals from Ox & Pine

Here's wishing you all a magical and adventurous 2018! We hope you have a good one. 

Etsy Dallas Holiday Playlist 2017

We are in full on holiday mode in my house. Put up the tree, dig the decorations out of the attic, heat the wassail, and turn up the holiday cheer! Wishing you all happy holidays from Etsy Dallas. Add some of our favorite songs of the season to your playlist.


Christmas Wrapping - The Waitresses

I’ll Be Home - Meghan Trainor

Do They Know It’s Christmas- Band Aid

Happy XMas - John Lennon

Please Come Home for Christmas- Aaron Neville

What Are You Doing New Year’s Eve - The Head and the Heart

You’re A Mean One, Mr. Grinch

Carol of the Bells - Destiny’s Child

Cuddle Up - Catey Shaw

It Came Upon a Midight Clear - Jewel

Sleigh Ride - The Ronettes

Let it Snow - She and Him

Frosty the Snowman - Fiona Apple

Rudolph the Red Nosed Reindeer - Jack Johnson

Wonderful Christmastime - Paul McCartney

Auld Lang Syne - Hotel Cafe

Loving the Jingle Bash images from Mirrorless Mind Studio

We love the images our photographer captured at the Jingle Bash, y'all. We had a hard time narrowing down the shots to share in this post but we picked out just a few of our favorites. You can browse all the photos on flickr. Shout out and big thank you hearts to Cigi of Mirrorless Mind Studio for her beautiful work.

We hope you all are having a magical holiday season. We have been busy working on plans for 2018. If you haven’t yet, be sure to sign up for our newsletter so you don’t miss all the fun!

Stock up on handmade goodness this holiday season

We know y'all love handmade art and the makers who create it. And we are so grateful that you do. We have put together a list of local Dallas-area finds from our member shops for you, just in time for Black Friday and Small Business Saturday. Support local businesses and get some holiday shopping done this Thanksgiving season. And don't forget to treat yourself!